- Home
- How to Migrate

System Necessities

The interface of the software is intuitive and is designed to make the migration process easy and accurate. For complete database migration, just browse the NSF file and follow the Next-2 process. For customizing the migration process and utilize the Advance capabilities of the tool, follow the steps shared below:
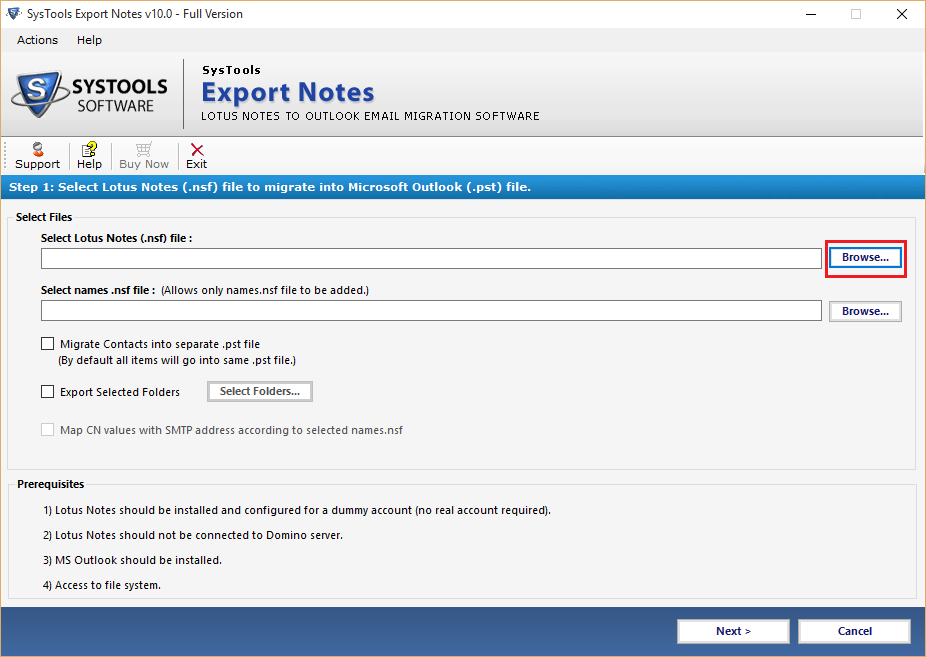
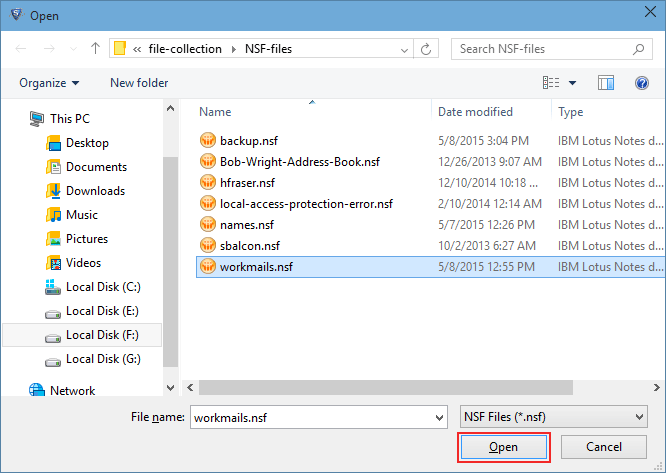
Click on the Application icon and launch the software for migration process. Screen provides Two options to convert NSF files. First select the NSF database file(*.nsf) and second select the Names.nsf file of contacts. Click on Browse button in order to locate the NSF file needed for the conversion:
After selecting the Lotus Notes database file, click on Open button:
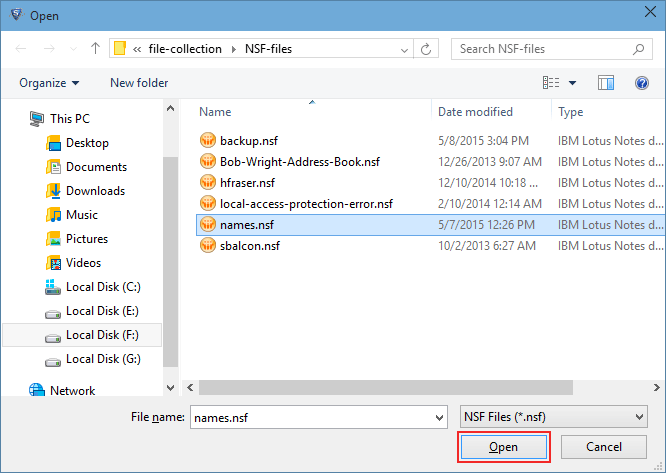
For names.nsf file conversion, click on second Browse button which allows converting only Lotus Notes Address Book:

Choose the names.nsf file from the saved location and click on Open button:
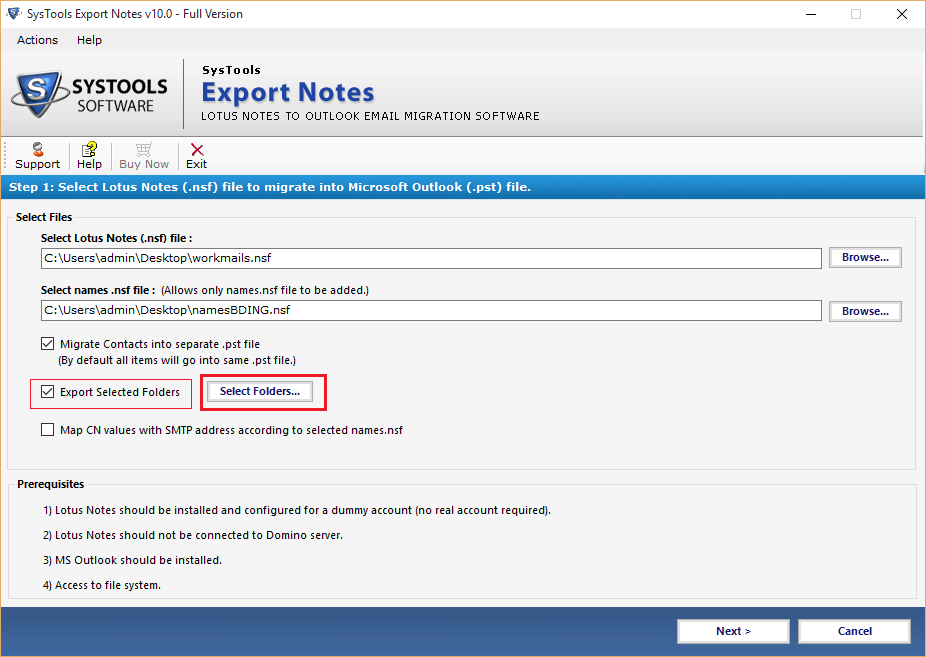
Check the option Migrate Contacts into Separate PST otherwise software add the contacts of names.nsf file into same PST:

By using the Export Selected Folders option, choose the existing folder which you want to migrate into PST and uncheck the rest folders. After setting the changes click on Apply button:
For specific date range migration of Lotus Notes Emails, Calendars, Journals and tasks Apply Filter option in front of the category:
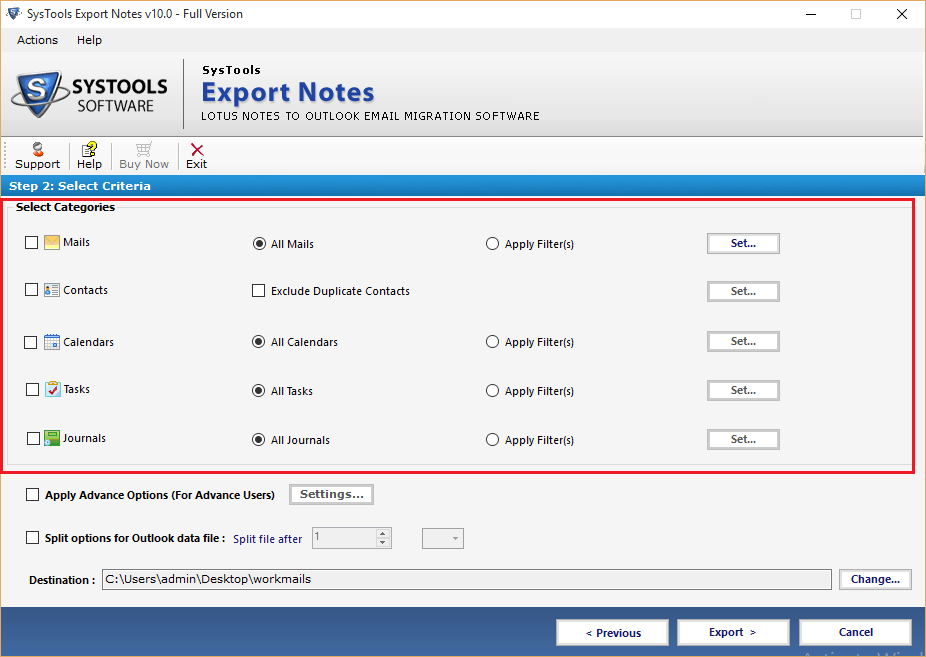
To restrict the duplicate contacts from migration to PST choose the option Exclude Duplicate Contacts:
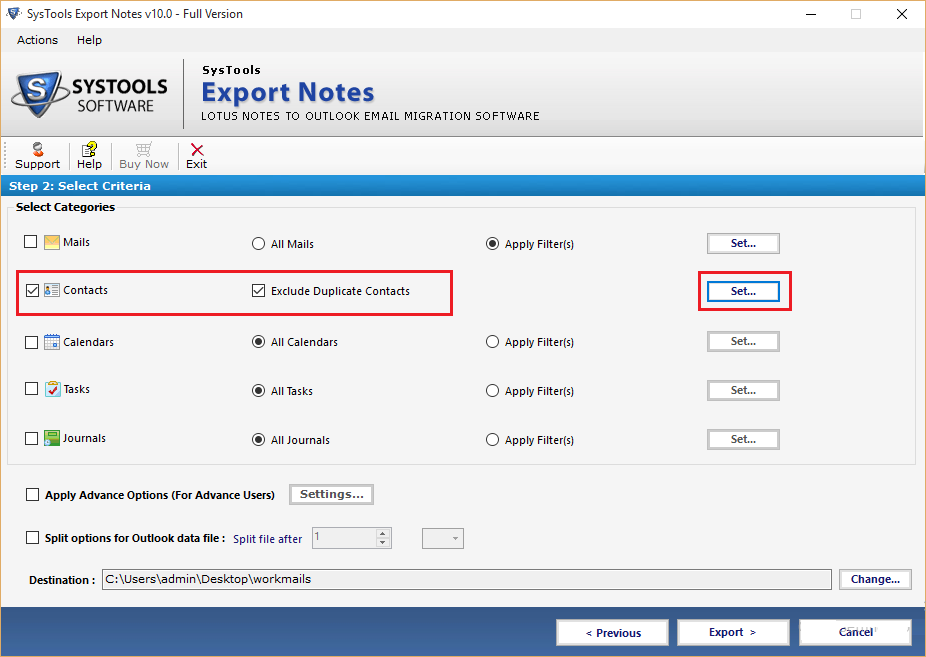
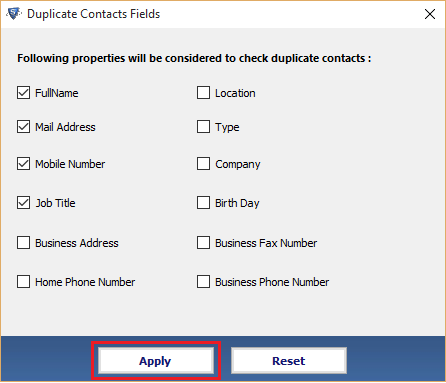
Check the contact properties to filter out the Lotus Notes unique contacts:
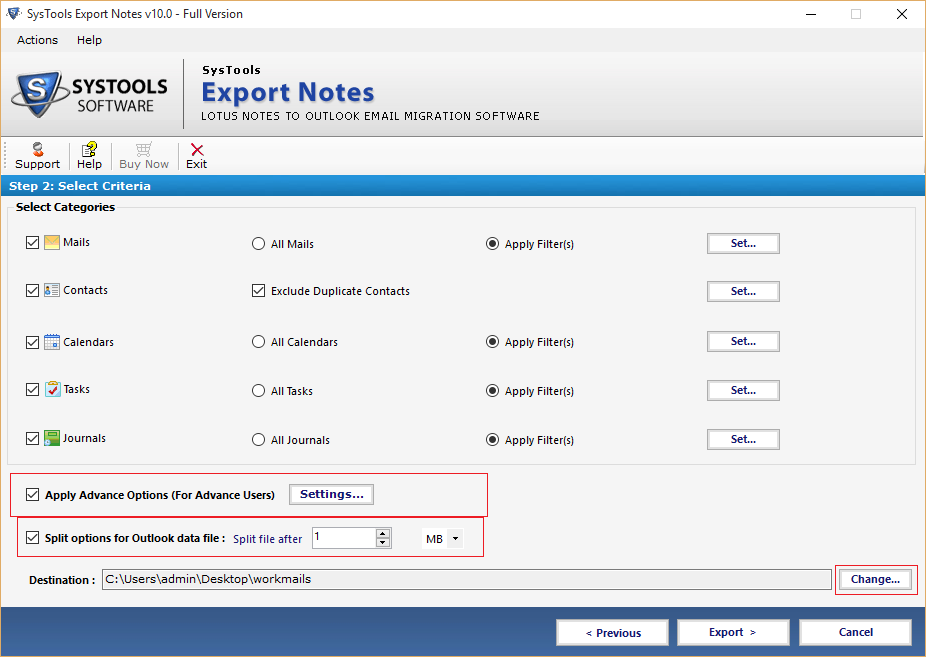
Apply the Advance Setting according to the migration need and the make conversion more effective and easy:
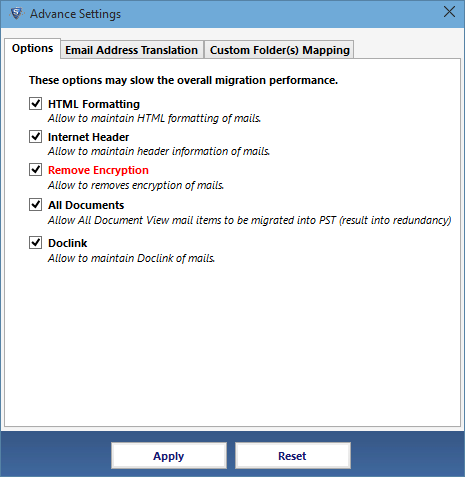
In first tab of advance setting check the options to hold the HTML formatting, Internet Header, Doclinks and convert encrypted NSF mails and All Document folders at once:
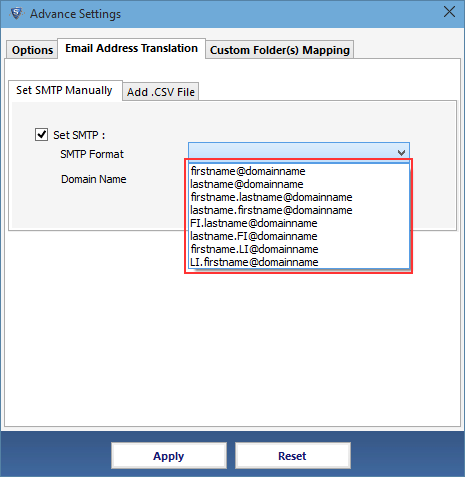
Second tab allow mapping the Lotus Notes Canonical values to SMTP email address. Add numerous CN names into CSV file and import it to map:
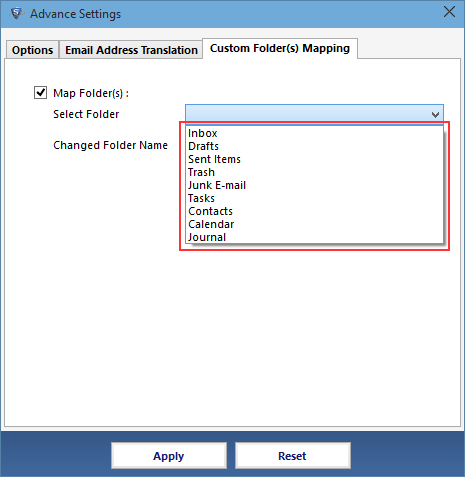
With Custom Folder Mapping option, map Lotus Notes system defined folder into various (new or existing) Outlook folders:
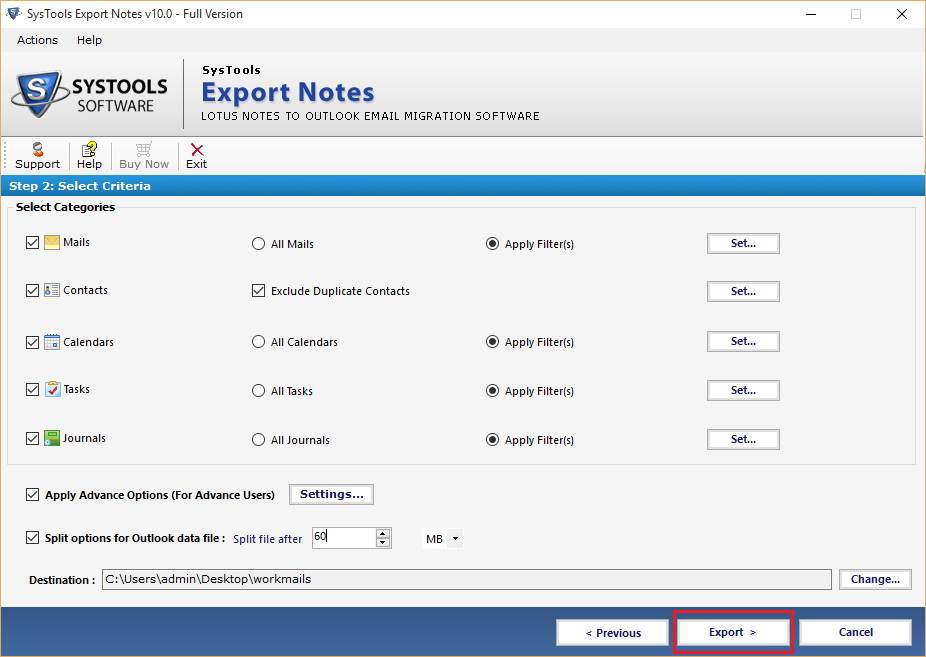
Splitting Outlook Data file, Software provides facility to break the Output PST file into smaller size (MB and GB) of PST file:

After applying the entire required advance setting for the conversion, click on Export button:
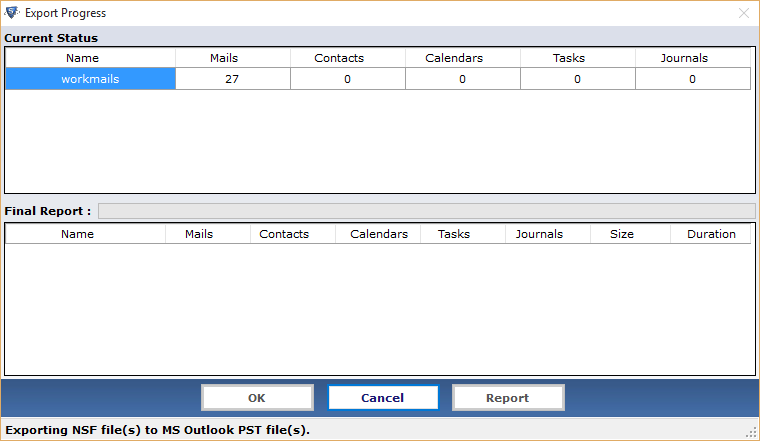
Get the current statics of conversion process and the status of each folder after complete conversion process:
Next Step: